Updated for Blender Version: 3.1
To the Point
- Select the desired object
- Click the Modifiers tab

- Click the Add Modifier dropdown
- In the second column, towards the bottom, click Subdivision Surface
- Adjust settings as needed
- Right-click on the object and select “Shade Smooth”
The Details
A typical modeling workflow starts with rough shapes to “sketch out” the general layout and feel of your model, then more details get layered on little by little. One of the most widely used modifiers to help smooth out a detailed model is the Subdivision Surface modifier. In Object mode, select the object you wish to smooth out, then select the Modifiers tab from the Properties bar on the right-side panel. ![]()
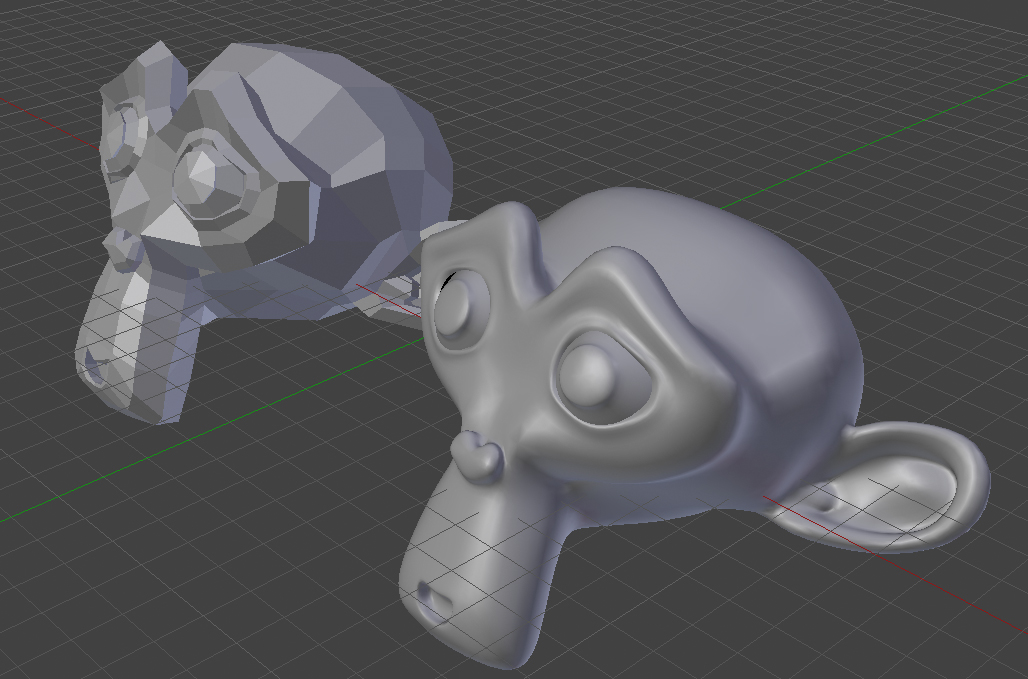
Click the “Add Modifiers” dropdown and select Subdivision Surface (commonly referred to as “subsurf”). You’ll notice right away that your model looks much more rounded. The SubSurf modifier takes the geometry of the object and “subdivides it” behind the scenes, averaging angles, giving the object more geometry to work with and thus making it look smoother and more rounded. Now you may look at this and realize that the faces making up the object are much more visible. To add another layer of smoothness, simply right-click on the object in Object mode, and click “Shade Smooth”. Below is an unmodified Suzanne primitive (in the back left), and the same Suzanne primitive with a SubSurf modifier and Smooth shading turned on. From here, there are several techniques and tools to utilize depending on the desired result. For example, a hard-surface model would benefit from adding more geometry with the knife and loop cut tools, as well as the crease tool to sharpen up particular edges, while leaving others smooth and subsurfaced.
Settings
There are only a few settings for the SubSurf modifier. Catmull-Clark is the algorithm used to calculate the smoothing, so generally, that can be left as-is. Below that on the left, you’ll see “Subdivisions” with settings for View and Render. “View” is the number of subdivisions to be shown in the viewport, while “Render” is the number of subdivisions when the scene is rendered. Typically the more subdivisions there are, the smoother the model gets, but this also comes at a cost – higher subdivision counts take longer to render.
Under Options, “Subdivide UVs” is turned on by default. This helps your UV maps match up better with the model itself. Lastly, “Optimal Display” is useful for working in Wireframe mode. Without optimal display turned on, every single “wire” of the wireframe will be displayed, including the extras generated by the modifier itself. Optimal Display only shows the wires editable on the object.

