Updated for Blender Version: 3.1
To the Point
Multiply your Object as an Array
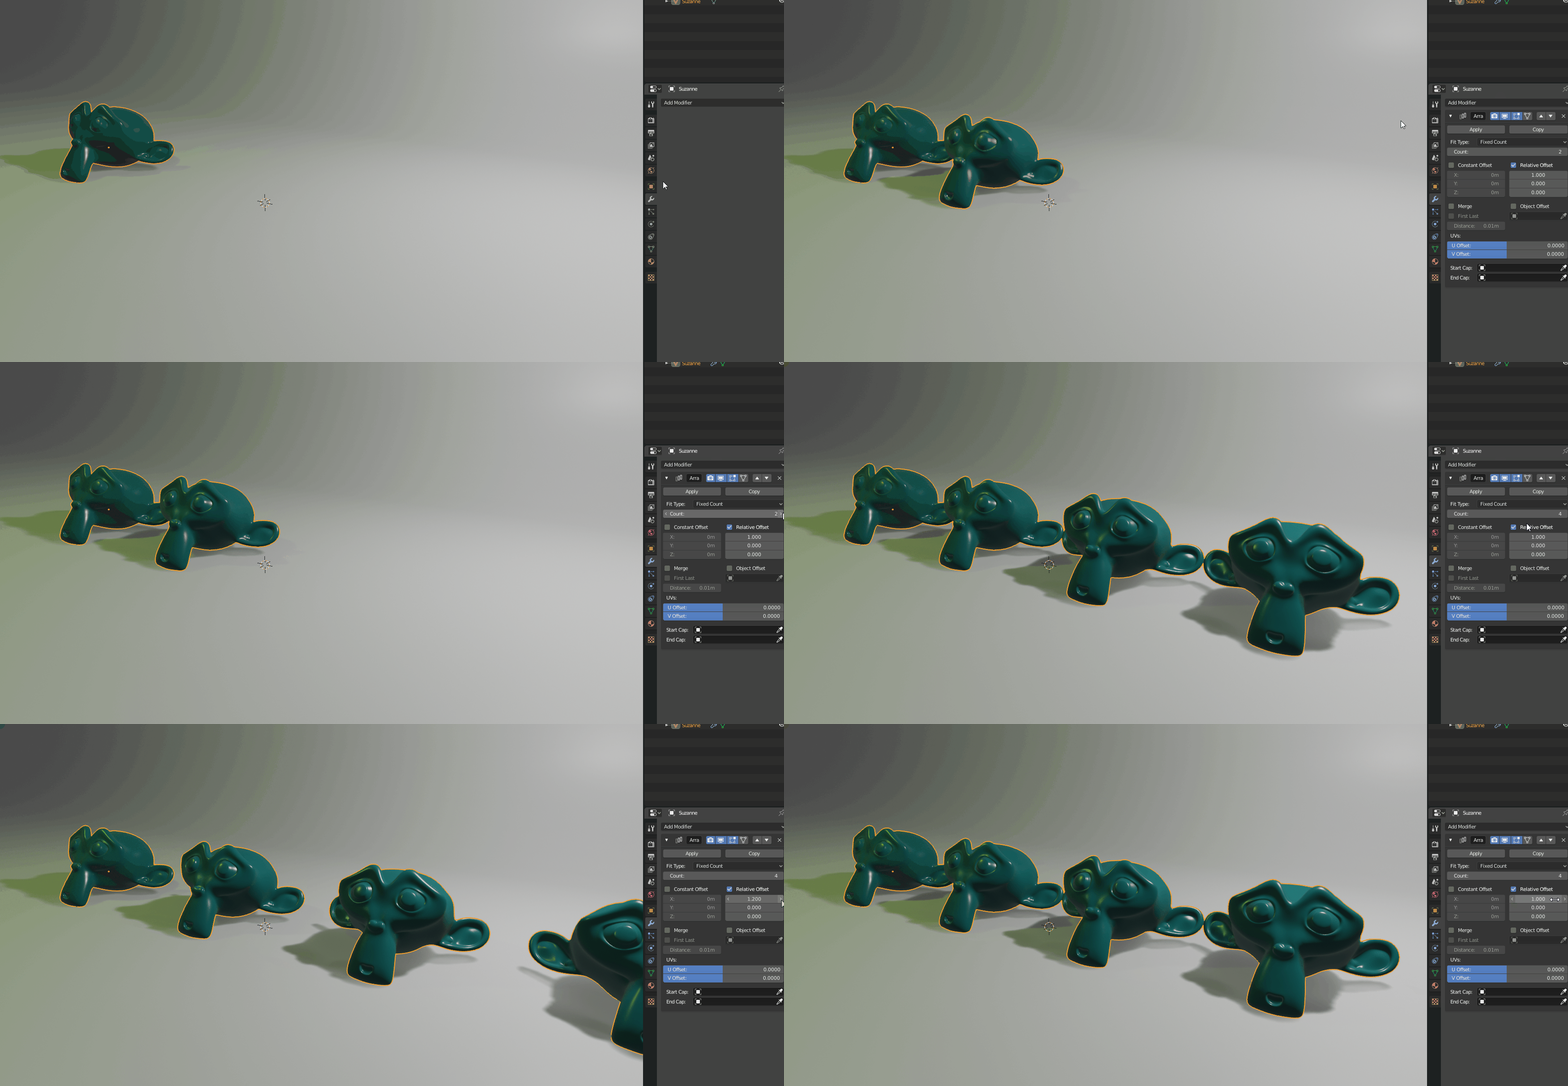
- Select object to duplicate
- Click on the Modifiers tab

- Click the “Add Modifier” dropdown and select “Array”
- Use the “Count” slider to adjust the number of duplicates to create
- Use the “Relative Offset” section to adjust the spacing from the original mesh along the X, Y, and Z planes
The Details
Any 3D workflow benefits from time-saving shortcuts that automate tedious repetitive tasks, such as remodeling identical objects, or copy-pasting dozens (or even hundreds) of duplicates of an object. The Array modifier makes replicating an object easy. With a few simple clicks, the modifier handles any tedious repetition and before you know it, you’ll have a streetlamp-lined road, a long interior corridor, or whatever your imagination may invent.
The Array modifier simply takes the selected object and duplicates it a number of times along a defined axis. Start by selecting the object you wish to duplicate. Along the right hand side of the screen, find the small wrench icon ![]() . This is the Modifiers tab. From there, click the “Add Modifier” dropdown tab. In the dropdown under the second column, at the top is the “Array” option. After selecting “Array”, you will immediately see your object duplicate. Back on the right side, in the Modifier panel, there is a “Count” option which, predictably, changes the count of objects duplicated.
. This is the Modifiers tab. From there, click the “Add Modifier” dropdown tab. In the dropdown under the second column, at the top is the “Array” option. After selecting “Array”, you will immediately see your object duplicate. Back on the right side, in the Modifier panel, there is a “Count” option which, predictably, changes the count of objects duplicated.

Quick Note
If you now switch into Edit mode with the Array-modified object selected, you’ll notice that only one mesh is editable. That is the original object and all the duplicates in the array are based on that. Edit the original object and all subsequent objects in the array will be changed as well.
Relative vs. Constant Offset
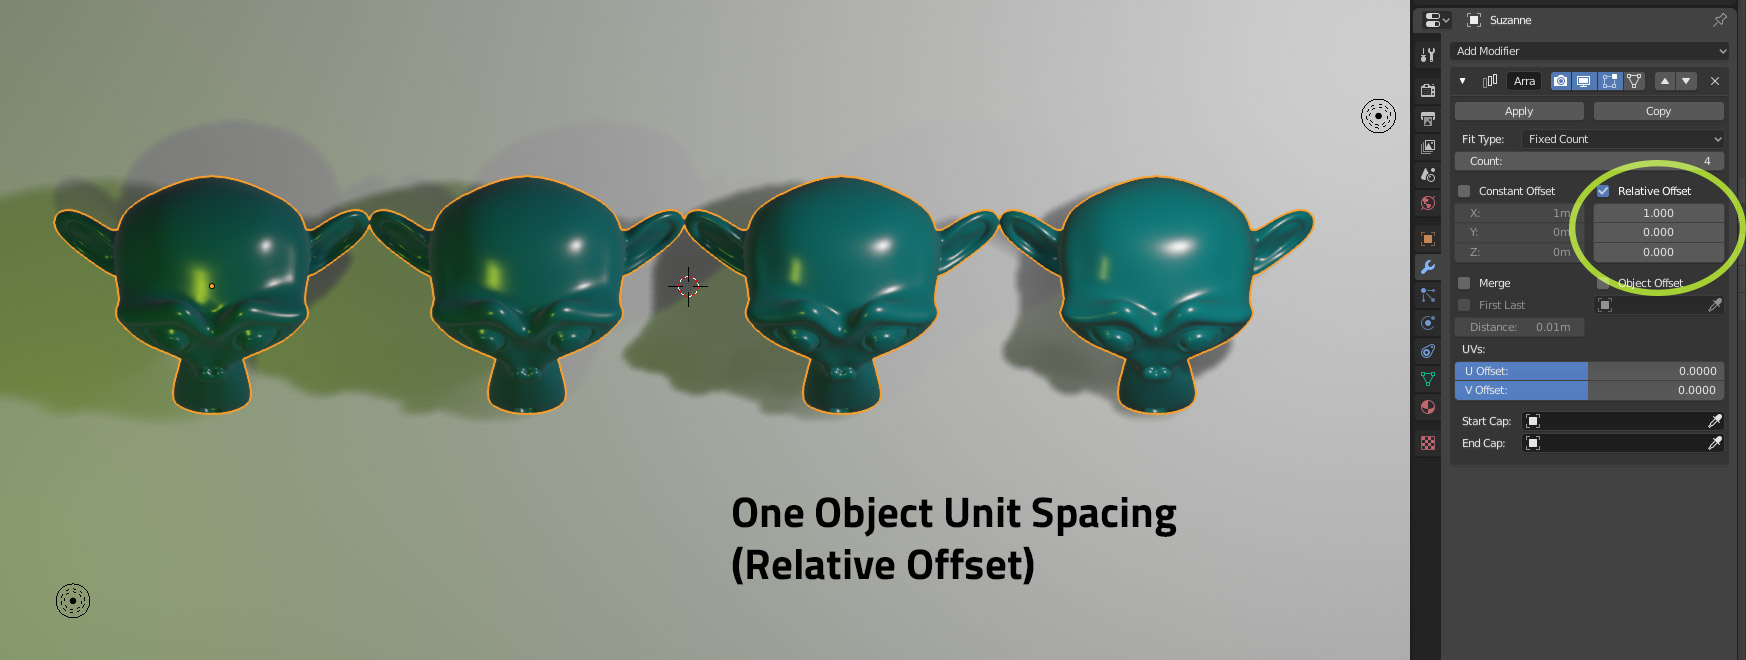
Below the “Count” setting, you will see three sliders for both “Constant Offset” and “Relative Offset”. Each one controls the spacing between the objects in the array along each axis. By default, the array uses a Relative Offset along the X axis, set to 1.
Relative Offset uses the width of the object itself as a measurement. A Relative Offset of 1 along the X axis means that every object in the array will be one object-width away from the next object:

Setting the offset to 2 in this example would add an empty space the width of the object between each object, and so on.
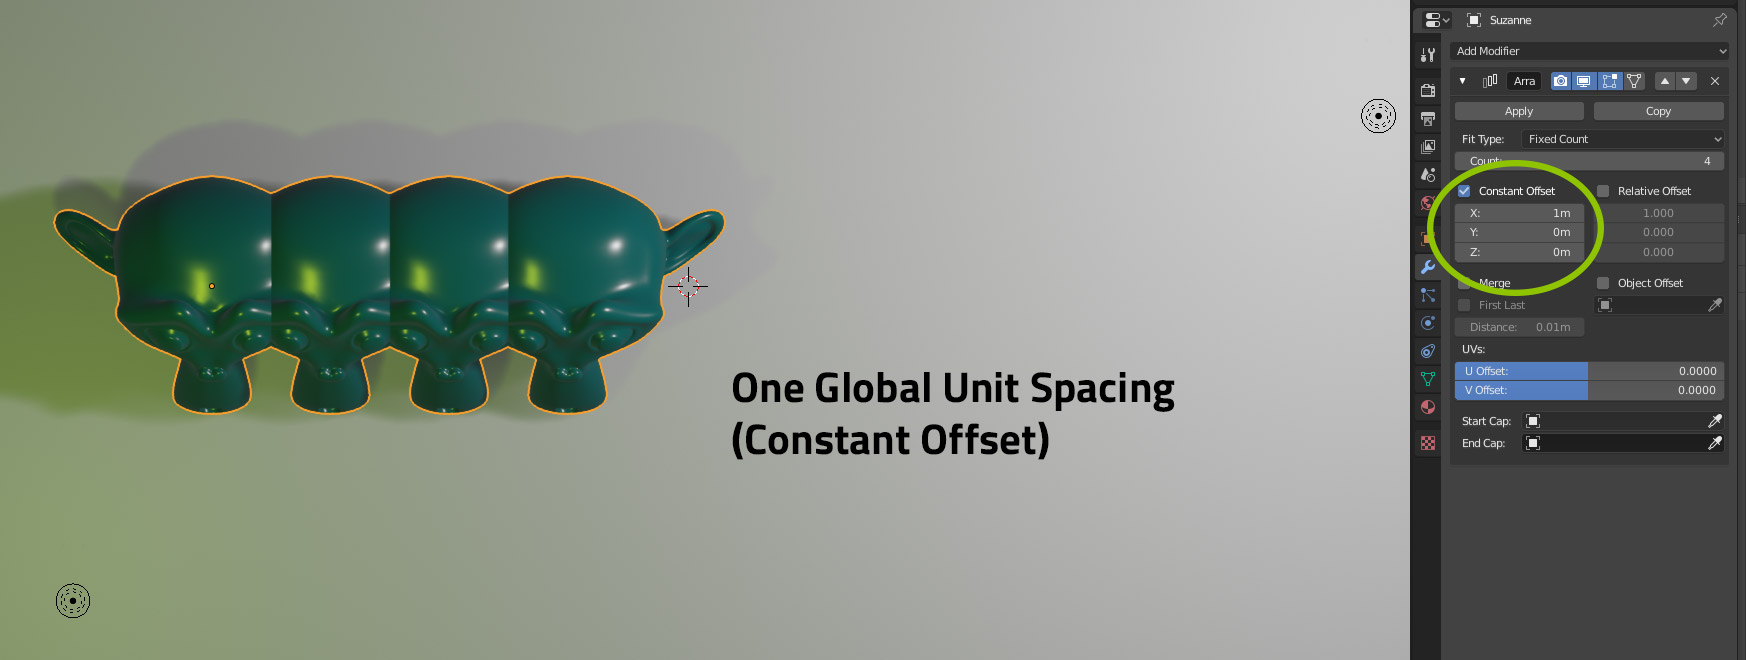
Constant Offset similarly spaces the objects away from the original, but it uses the World Units as a measurement. A Constant Offset of 1 along the X axis means the objects are offset by 1 world unit – be it meters, centimeters, feet, etc.

