Updated for Blender Version: 3.1
To the Point
- Select the object to mirror
- In Object Mode, go to the Modifiers tab
 and from the Add Modifer dropdown, add a Mirror Modifier
 - Adjust the axis with which to mirror the object, and set a mirror object if necessary
- Continue modeling your object in edit mode and see the changs reflected on the mirrored portion of the object
- Click “Apply” to turn the mirrored portion of the object into an editable mesh (if desired)
The Details
Frequently 3D modeling requires the object to be symmetrical, or at least in the block-out phase it is symmetrical. For example, a face or head may start out with the rough shapes being symmetrical, but the fine details may be asymmetrical. Using the Mirror Modifier is a way to significantly speed up your modeling workflow for symmetrical objects since you only have to work on one side of the object.
Start by selecting the object you want to mirror. Stay in Object Mode, and in the Modifiers Tab ![]() , select Mirror from the Add Modifier dropdown. Your object will then, by default, be reflected across its pivot point, or Origin. There are multiple techniques for changing the origin of an object with the Set Origin command. Once the Mirror Modifier has been added, you should see a copy of the selected object reflected across the axis you choose, as if being held up to a mirror. It’s worth noting that your original object is still editable in Edit Mode. Changes made to the original piece of the mirror will be mimicked on the reflected piece of the mirror, thus speeding up your workflow since you will now only have to model HALF of your symmetrical model. You’ll see a few important options along the right:
, select Mirror from the Add Modifier dropdown. Your object will then, by default, be reflected across its pivot point, or Origin. There are multiple techniques for changing the origin of an object with the Set Origin command. Once the Mirror Modifier has been added, you should see a copy of the selected object reflected across the axis you choose, as if being held up to a mirror. It’s worth noting that your original object is still editable in Edit Mode. Changes made to the original piece of the mirror will be mimicked on the reflected piece of the mirror, thus speeding up your workflow since you will now only have to model HALF of your symmetrical model. You’ll see a few important options along the right:

The axis checkboxes tell the modifier over which axis to reflect the object. Different axis can be selected simultaneously for some interesting effects, but typically only one is used at a time. When an axis is selected – in this case the X axis, the “Bisect” checkbox becomes available. Without “Bisect” selected, the object (in edit mode) can be translated or rotated over the mirror axis, which results in the duplicated objects overlapping each other:
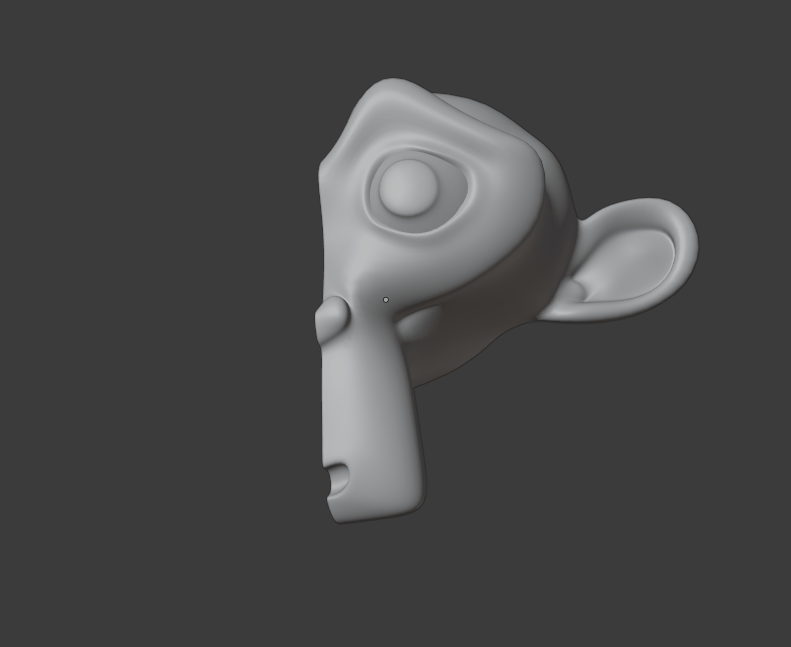
If “Bisect” is turned on, any pieces that overlap the mirror axis are hidden: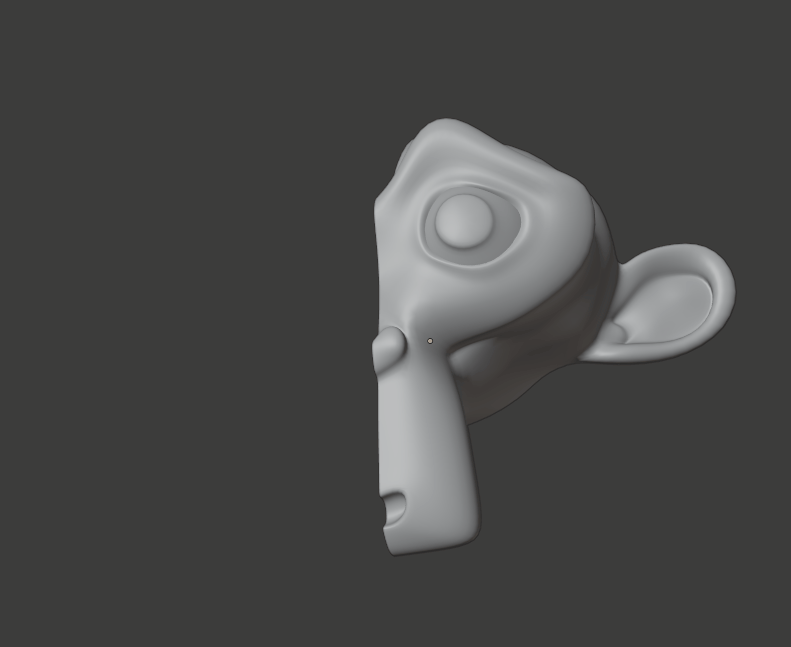
The last setting in that section is “Flip”, which simply flips the Bisected piece. With it not selected, the overlapping pieces are hidden. If Flip is turned on, ONLY the overlapping pieces are showing.
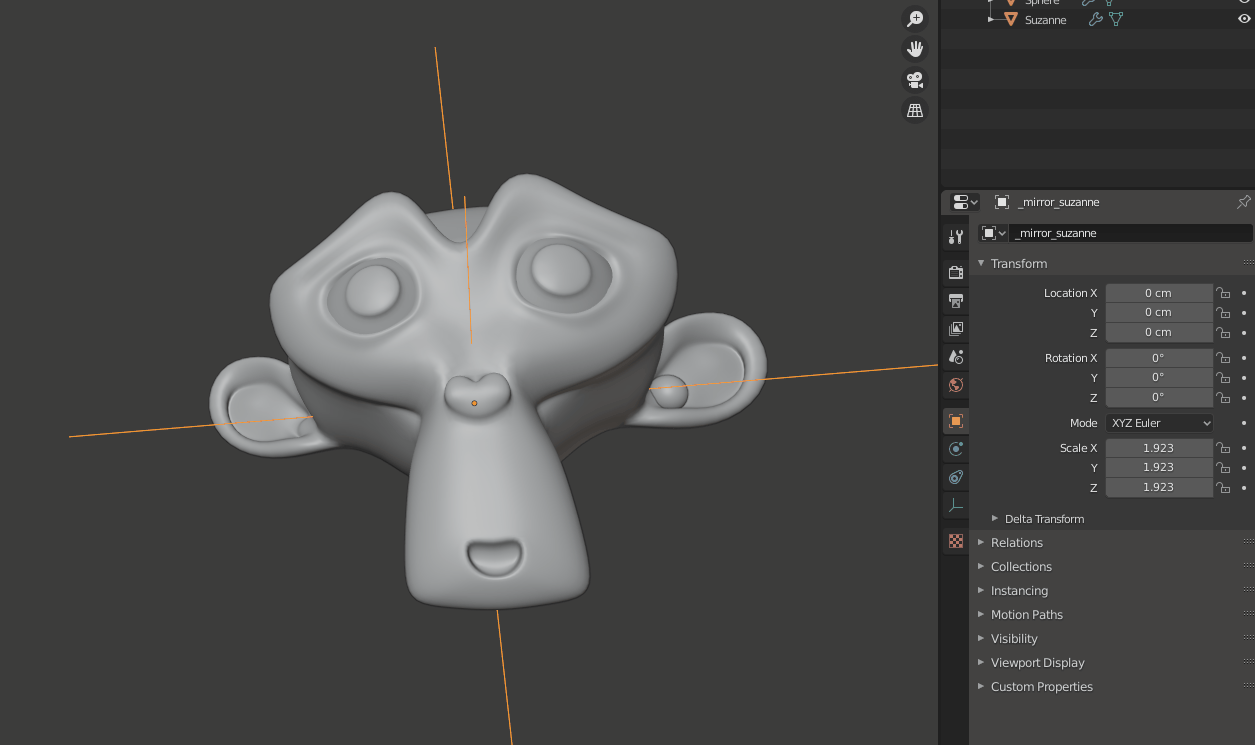
Mirror Object
Another important setting to utilize is the Mirror Object field. Let’s say you want to model a mirrored object on the other side of your scene. For example, you might be modeling a car and you are working on one of the side doors. Setting a mirror object to reuse can help you make sure the multiple objects across your project have the same mirror axis.
Let’s take a look at our Suzanne example. Let’s say you want to give her some earbuds, so you start with a sphere in one ear. You want to mirror it to the other side, but it needs to be mirrored on the other side of Suzanne, not the other side of the sphere object itself. Start by adding an Empty to your scene by pressing Shift+A and selecting Empty > Plane Axis. Make sure this Empty is at the exact center symmetry point of your object, and name it something useful like “_mirror_suzanne” in this case. Select the object to mirror, add the mirror modifier, but this time under Mirror Object, click the eyedropper, and select the Empty.
The other options of note are the Clipping checkbox and the Merge Limit slider. Turning clipping on is like making the mirror axis a wall. No vertices in edit mode will go past the mirror axis. The Merge Limit slider tells the modifier how close the mirrored vertices should be before they are merged when the modifier is applied.