Updated for Blender Version: 3.1
To the Point
- In the layout tabs along the top, click the plus (+) icon
- Chose an existing workspace to duplicate
- Click inside the field to rename new layout
The Details
Using Blender’s Save Startup functionality makes it easy to set up your Blender environment just how you want it. Along the top of the Blender window, there are a series of tabs showing the pre-built layouts. These built-in layouts offer a quick way to change your view based on the task at hand. For example, clicking the Animation layout reconfigures the UI panes to include necessities for animation like the timeline, dope sheet, and f-curve views.
Customized Layout
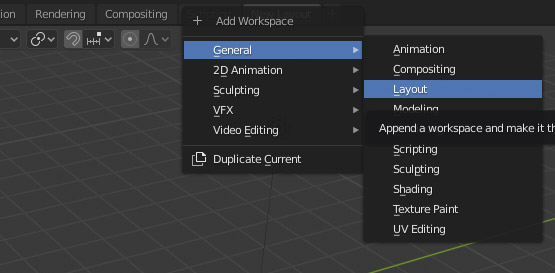 You can further customize the user interface windows and panels by saving them as a preset to that same dropdown. Click the plus (+) sign next to the layout tabs to create a new custom UI layout. Blender 2.8 requires you to pick an existing layout as a base. Choose a layout that you would like to modify. You will see a new tab added to the top of the Blender screen, which can be renamed by double-clicking on it. Once the custom tab is renamed, you can reorganize the panel layout as needed and it will be saved as that layout. To remove a custom layout, right click on the tab and click Delete
For example, this is a simple set up for modeling and texturing – the 3D view is on top with the bottom section split between Node Editor and the UV/Image Editor.
Save It
To make any custom workspace layouts show up across Blender new projects be sure to save the startup file. Your new UI layout or layouts will now be available to all future Blender projects that are started.