
Updated for Blender Version: 3.1
Get to the Point
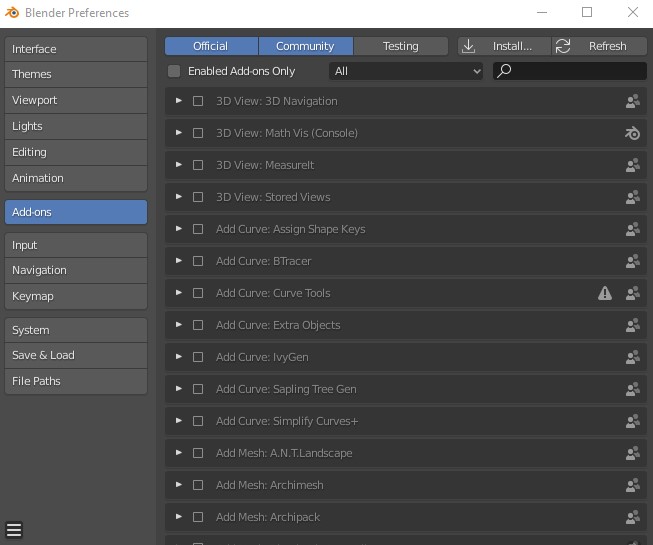
- Edit > Preferences > Add-Ons
- Use search feature to find add-on
- Click the checkbox to activate add-on (if not already active)
Custom Add-On
- Edit > Preferences > Add-Ons
- Click “Install…” button in the top right of the window
- Find the Add-On file to install (usually a .zip or .py)
- Click “Install Add-on”
While the regular “out-of-the-box” download from Blender.org is powerful enough for all your 3D modeling, rendering and animation needs, there are plenty of tools and plugins out there to help speed up your workflow. There are hundreds of add ons available to Blender – everything from retopology tools, to streamlined boolean operations, to crowd simulators. Many of these add ons are available right away. Simply click Edit > Preferences, and click on the Add Ons tab. Add ons that are available, but deactivated, will be greyed out. To activate an add on to your Blender install, simply find the add on that you wish to include (the search bar is usually the easiest way to go to find what you need) and click the checkbox to activate it.
 Custom Add Ons
Sometimes the add on that you are looking for is not available in the standard list. Perhaps it was an add on that you purchased and downloaded from a site like Blender Market. To install a custom add on to Blender, click Edit > Preferences, click on the Add Ons tab, then click “Install…” in the top right corner of the window. Navigate to the add on file (typically a .zip or .py file), then click “Install Add-on” in the lower right. Back in the Blender User Preferences window, do a quick search for the installed add on to make sure it is activated.