
Updated for Blender Version: 3.1
Get to the Point
- Edit > Preferences
- Click the Add-Ons tab
- Search “Image”
- Activate the “Import-Export: Import Images as Planes”
- Close User Preferences window
- File > Import > Images as Planes, or in the 3D Viewport press Shift+A > Images > Images as Planes
- Find and select an image to import
- Click Import Images as Planes in the bottom right of the window
Sometimes it is helpful to import images into a scene to be used as a part of your scene, rather than just background reference images. The easiest way to do this is to install an add-on to your version of Blender. Find and install the add-on called “Import-Export: Import Images as Planes”. Once this add-on is installed, click File > Import > Images as Planes. Navigate to the image file you wish to add, select it and click Import Images as Planes in the top right. The image will now be in the scene, editable and moveable like any other plane or object. This is very similar to adding reference images to your scene, though with this method, the plane can be rendered by default.
Import Settings
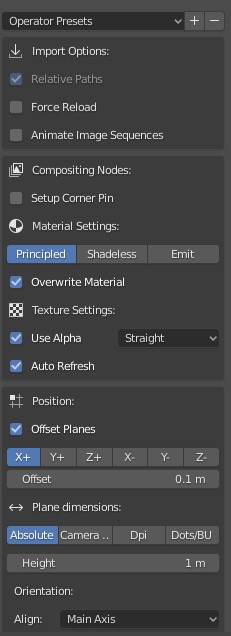 There are a few options to keep in mind when importing an image. When you click File > Import > Import Images as Planes, you will see the settings tab in the right panel. Generally speaking, the most used settings are the Material settings. “Diffuse” is selected by default, which means the plane will be affected by light and shadow in your render. Selecting “Shadeless” will remove that effect, leaving the image flat and non-reflective. The “Emit” setting will cause your image to cast light into your scene.
The “Use Alpha” checkbox is useful for using PNG files that have transparency. For instance, say you wanted to layer in some trees in the background of your scene, but since they are in the distance you decide to use image planes to save on render time. The images used are trees cut out on a transparent background. Using the alpha setting when importing the image will maintain that transparency.
Also worth noting, there are a variety of position settings useful for orienting and positioning the image in the scene. By default, the image will be placed at the 3D cursor position, unless otherwise specified.