Updated for Blender Version: 3.1
To the Point
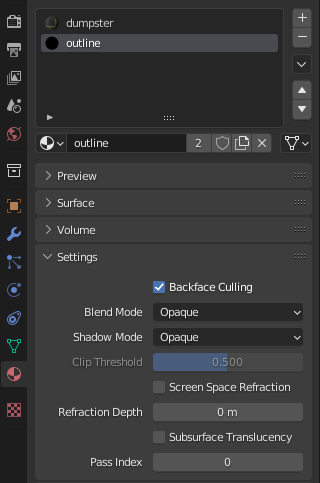
- Add a regular material to the object
- Add a second material, call it “Outline” and set the color to black
- In the material settings, under Viewport Display > Settings, turn on “Backface Culling”
- Add a Solidify modifier.
- Set Solidify thickness to a negative number
- Check “Flip Normals”
- Set “Material Index” to 1
- Adjust “Thickness” as needed
The Details
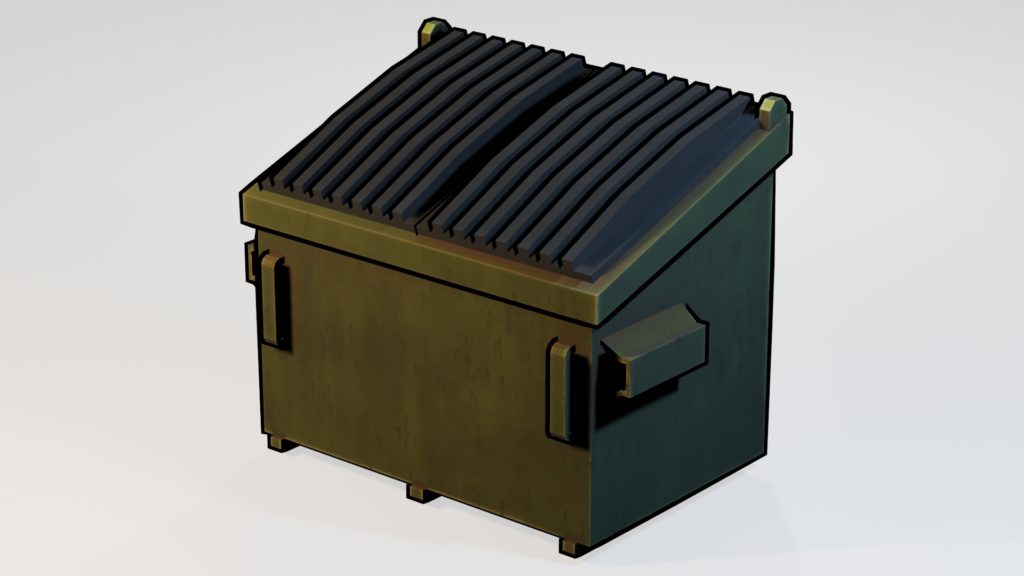
There are several ways to add a cartoon-style outline to objects in Blender. One method for real-time outlines is the “inverted hull” method, which involves some simple trickery with the Solidify modifier. It’s an easy process, so let’s get into it.
Quick note – this will only work in the Eevee render engine.
Create the Outline Material
Start by selecting the object that you want to add an outline to. Click on the Material Properties ![]() and add a new material. This will be the main material that you can use to texture the object. In that same Material Properties panel, click the + button to the right of the list of materials. This will add a new material. Call it “Outline” and give it a solid black color. Scroll down the Material Properties panel to the Settings dropdown. Open it and make sure the checkbox for “Backface Culling” is turned on.
and add a new material. This will be the main material that you can use to texture the object. In that same Material Properties panel, click the + button to the right of the list of materials. This will add a new material. Call it “Outline” and give it a solid black color. Scroll down the Material Properties panel to the Settings dropdown. Open it and make sure the checkbox for “Backface Culling” is turned on.

The material is set. Now let’s get it to outline your object.
Set the Solidify Modifier
With the Outline material set, go to the Modifier Properties panel ![]() and add a Solidify Modifier. Set the “Thickness” to a small negative number like -0.03. We can change this later. Under the “Normals” dropdown, be sure the “Flip” checkbox is selected. In the “Materials” dropdown, set the “Material Index” to 1. This will select your Outline material and use that in the Solidify modifier.
and add a Solidify Modifier. Set the “Thickness” to a small negative number like -0.03. We can change this later. Under the “Normals” dropdown, be sure the “Flip” checkbox is selected. In the “Materials” dropdown, set the “Material Index” to 1. This will select your Outline material and use that in the Solidify modifier.
Go to Rendered View in the 3D viewport and you should now see a black outline around the edges of your object.

Adjust the Solidify Modifier’s thickness as desired.

